Exch 2013 EAC | eDiscovery page error “The request failed. The remote server returned an error: (400) Bad Request.”

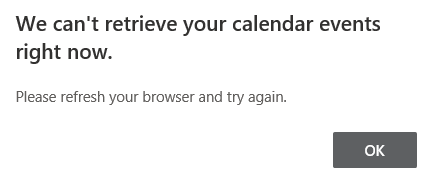
We are running Exchange Server 2013 CU23 on all servers and recently when trying to perform an eDiscovery search in the Compliance Management section of the Exchange Admin Center it reported an error “The request failed. The remote server returned an error: (400) Bad Request.”

eDiscovery page error

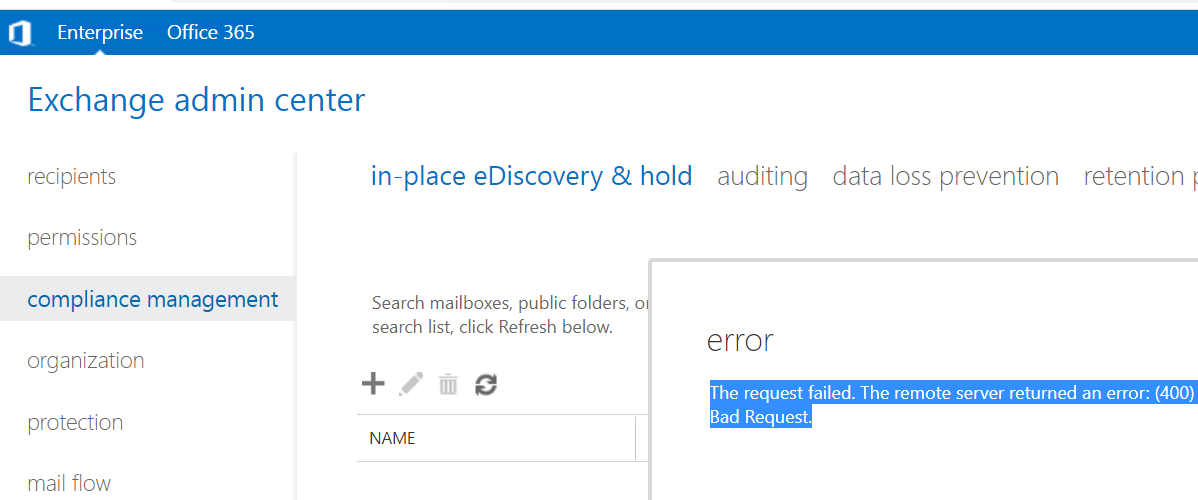
I got this error as soon as I selected the Compliance Management section and even if I manage to create an eDiscovery search it would fail at the last step with the same error. The error was not specific to any server but happened across all the Exchange 2013 servers in the environment.

If I try to execute the cmdlet Get-MailboxSearch or New-MailboxSearch it would also return the same error. The error returned in Event Viewer is as shown below:

Microsoft.Exchange.Data.DataSourceOperationException: The request failed. The remote server returned an error: (400) Bad Request. ---> Microsoft.Exchange.WebServices.Data.ServiceRequestException: The request failed. The remote server returned an error: (400) Bad Request. ---> System.Net.WebException: The remote server returned an error: (400) Bad Request.

Upon researching about this error we came across this MS thread which discussed the same issue. We ran the below command on our multi-role Exchange 2013 server to check the existing values configured on the InternalNLBBypassUrl parameter of the EWS frontend and backend website:

Get-WebServicesVirtualDirectory -ShowMailboxVirtualDirectories -Server ServerName | fl identity,*url*

Incorrect configuration

As you see, the InternalNLBBypassUrl on the EWS Default Web Site and Back End website is populated with a value. However, this is different from the default configuration of the EWS virtual directories as per Microsoft. According to Microsoft, the correct configuration for the Default Web Site’s InternalNLBBypassUrl is “Null”. And since the Back End website listens on TCP 444 the format should be https://serverfqdn:444/ews/exchange.asmx. ie, it should look like below configuration:

Correct configuration

So to fix the issue, first correct the InternalNLBBypassUrl value on the EWS Default Web Site. Launch the Exchange Management Shell and execute the below command

Set-WebservicesVirtualDirectory -Identity “Servername\EWS (Default Web Site)” –InternalNLBBypassUrl $null

Secondly, correct the InternalNLBBypassUrl value on the EWS Back End website. This has to be done using PowerShell by loading the Exchange PowerShell Snapin. This is because running the same command on Exchange Management Shell will fail with an error mentioning that the operation is outside the users’s write scope. Also, keep in mind that modifying the back end website using this method maynot be supported by Microsoft.

Launch Windows Powershell as an Admin and execute the below commands:

Add-PsSnapin *Exch*

Set-WebservicesVirtualDirectory -identity “ServerName\EWS (Exchange Back End)” –InternalNLBBypassUrl https://serverfqdn:444/ews/exchange.asmx

Now run the command to confirm if the changes have been applied:

Get-WebServicesVirtualDirectory -ShowMailboxVirtualDirectories -Server ServerName | fl identity,*url*

If in case the changes are not applied yet, you can Recycle the MSExchangeServicesAppPool from IIS.

Navigate to the Exchange Admin Center -> Compliance Management and make sure that you are no longer receiving the 400 error code.

Repeat the same steps for all the Exchange Servers in your environment. Ideally, if this setting is corrected on the Exchange Server that hosts the Arbitration mailbox or Discovery Search mailbox, the issue should get fixed. However, if this server is not available for any reason the mailbox might move to a different server and then there are chances you might notice the error again. So it is better to make the same changes on all the servers.

To check the location of the Arbitration Mailbox and Discovery search mailbox you can use the below commands:

Get-Mailbox -RecipientTypeDetails DiscoveryMailbox | select name,database

Get-Mailbox *Disc* | fl name,alias,servername

Get-Mailbox -Arbitration | fl Name,Database

In my case, couple of Exchange Servers were recently recovered due to corruption and after the disaster recovery steps, the default values were changed. So if your environment has any Exchange Servers recovered recently, just make sure that these values are configured correctly.

Error “Policy does not allow granting permissions at this level to one or more of the recipient(s). Please select another permission level and send the sharing invite again.” | Exchange Hybrid

I recently had a user complain that he was not able to share his calendar information with his boss in Outlook. Upon checking I noticed that the affected user’s mailbox is hosted on Exchange Server 2013 and the boss’s mailbox is hosted on Office 365 cloud. Our environment is in an Exchange Hybrid scenario with Office 365. The user was able to share just the availability information but whenever he selected limited details or full calendar details the sharing failed.

Calendar sharing in Outlook

The error the user had received when selecting Limited details or Full details was as shown below:

Sharing error

I had already confirmed that free/busy is working cross premises as expected. When researching on this issue I came across this Microsoft article that suggested to select the recipient through Global Address List. However, this did not help me. Then finally I noticed another article here that suggested to check the Sharing Policy assigned on the user mailbox.

I ran the below command and identified that the user is assigned to the Default Sharing Policy.

Get-Mailbox user | fl *sharing*

Checking SharingPolicy

At this point I navigated to the Exchange 2013 Admin Center -> Organization Configuration. The Default Sharing Policy was found in the Individual Sharing section.

Default SharingPolicy

I then edited the Default Sharing Policy configuration and noticed that only free/busy information is allowed to be shared with all domains. This was the reason why the user was able to share Availability information only with his boss and not limited/full calendar details.

Default SharingPolicy configuration

Inorder to fix this issue and if your organization permits, you can either edit the Sharing with all domains sharing rule and select the appropriate permission level under Share your calendar folder and save the settings as shown below:

or

you can create a new sharing policy for the specific domain (in this case your Hybrid/Split domain) and select “All calendar appointment information, including time, subject, location and title”. This is the preferred option.

Custom SharingPolicy

Save the settings. This should fix the sharing issue.

Error “451 4.7.0 Temporary server error. Please try again later. PRX2”

We had to rebuild one of our Exchange Server 2013 recently by performing disaster recovery steps as a result of an OS corruption. Once the server was back in production we started noticing that the server was not accepting any new emails. In the Queue viewer of the Exchange server that was sending mails to this recovered server, we noticed the error “451 4.7.0 Temporary server error. Please try again later. PRX2.”.

We had confirmed that Telnet to the problematic server on port 25 was working fine as expected. The send connector protocol logs of the sending Exchange Server was checked and it showed “Queued mail for delivery”. This indicated that the sending server was trying to send the emails to the recovered problematic server. Next, we tried to send an email using Telnet to the problematic server and received the same error as in the Queue viewer “451 4.7.0 Temporary server error. Please try again later. PRX2.”. The screenshot is shown below:

At this point, we switched to the problematic server for further troubleshooting. The Default Frontend receive connector protocol logs also showed the same PRX2 error along with a DNS error “451 4.4.0 DNS query failed“.

We had a custom receive connector which was actually responsible for receiving the emails from the Exchange server, the protocol logs showed that connection is made but reported proxy and DNS errors:

The connectivity logs also had similar DNS retry errors. The application event logs on the server reported Event ID 16025 that the DNS Servers could not be contacted from the server’s network adapter with its respective adapter guid value. It also suggeted to run the Get-NetworkConnectionInfo command for more information:

The Get-NetworkConnectionInfo command returned the results of different Network adapters on the server and its configurations. To our surprise the Adapter guid value on the server did not match the Adpater guid value shown in the above screenshot. This prompted us to check the DNS Configurations on the FrontEndTransportService and TransportService by running the commands

Get-FrontendTransportService Servername | fl *dns*
Get-TransportService Servername | fl *dns*

It was then identified that the InternalDNSAdapterGuid value was still referencing the old server’s Adapter guid instead of the correct value diplayed when executing the Get-NetworkConnectionInfo. The DNS issues were finally resolved by mapping the InternalDNSAdapterGuid value to the correct guid of the server’s network adapter. This can be done by executing the command

Set-FrontEndTransportService ServerName -InternalDNSAdapterGuid {GUID}

Set-TransportService ServerName -InternalDNSAdapterGuid {GUID}

You can also assign the value of InternalDNSAdapterGuid to “00000000-0000-0000-0000-000000000000” so that internal DNS lookups are performed by using the DNS settings of any available network adapter.

More info on InternalDNSAdapterGuid parameter:

-InternalDNSAdapterGuid

The InternalDNSAdapterGuid parameter specifies the network adapter that has the DNS settings used for DNS lookups of servers that exist inside the Exchange organization. The concept of an internal network adapter and an external network adapter is only applicable in a multi-homed Exchange server environment. When no particular network adapter is specified as the network adapter for external DNS lookups, the value of the InternalDNSAdapterGuid parameter is 00000000-0000-0000-0000-000000000000, and internal DNS lookups are performed by using the DNS settings of any available network adapter. You may enter the GUID of a specific network adapter to use for internal DNS lookups. The default value of the InternalDNSAdapterGuid parameter is 00000000-0000-0000-0000-000000000000.

Reference:

Exchange – Event ID 205 and Event ID 16025

“The EdgeSync Cookie has not been updated as expected” | EdgeSync Error

After rebuilding an Exchange 2013 MBX/CAS server in the environment, the Edge Subscriptions were re-created so that the new Exchange server can also participate in the EdgeSync synchronization. Once the Active Directory information was synchronized to AD LDS and mail flow was confirmed to be working, the next step was to make sure that the EdgeSync was working as expected.

Upon running the Test-EdgeSynchronization command the SyncStatus showed as failed with the reason

The EdgeSync Cookie has not been updated as expected. It may indicate EdgeSync has encountered synchronization errors. For more information, check the EdgeSync logs.”

The EdgeSync logs in the Exchange installation folder “\Program Files\Microsoft\Exchange Server\V15\TransportRoles\Logs\EdgeSync” were checked but did not report any issues.

Identified this technet article that discussed on the same issue and as per the article, the synchronization errors are due to stale entries in the ADAM database on the Edge Server. Below are the steps on how to clear these entries from ADSIEdit on the Edge Server:

  1. Login to the Edge Server and execute the command

Type “dsdbutil” and then type “list instances”, keep a note of the output

2. On the Edge Server, launch ADSIEdit.msc and select Connect to. Now, below the ‘Select a well known Naming Context‘ drop down menu select Configuration. Also update the Edge Server name and LDAP port number (50389) from above below Computer section and click OK.

3. Expand Configuration -> Services -> Microsoft Exchange -> First Organization -> Administrative Groups -> Servers -> Edge Server

4. Right click the Edge Server object and locate the attribute msExchEdgeSyncCookies. Remove any old DC values and other stale entries from here. Click OK.

5. Login back to the internal MBX/CAS server and execute the command to start synchronization of Active Directory data to the Edge Server. This will take some time depending on the number of recipient objects in your organization.

Start-EdgeSynchronization -ForceFullSync -ForceUpdateCookie

More explanation on these switches are available here.

6. Now, re-run Test-EdgeSynchronization and make sure that it completed successfully.

HCW8064 – HCW unable to perform OAuth | Free-busy issues

As part of an Exchange Server recovery, the Edge Servers were re-subscribed to the AD site and HCW was ran. The HCW did complete, but threw some warnings towards the end as shown below:

The warning HCW8056 was ignored as the receive connectors on both the Edge Transport servers were already setup correctly. At the same time, I was little bit sceptical about the warning HCW8064 and thought of going ahead with the post-checks. The link “learn more” pointed to this MS article.

After the mail flow checks were successful, next part was to perform free-busy checks. This is when I noticed that the free-busy from O365 to Exchange on-premises was failing with below error. The free-busy from Exchange on-premises to O365 worked fine however.

For free-busy to work correctly there are couple of checks performed by the Availability Service on Exchange Online in the following order :

a) Intra-Organization Connector [OAUTH] (for Exchange Server 2013 CU5+)

b) Organization Relationship [DAUTH]

c) Availability Address Space

To understand more about how hybrid free-busy works please read this Microsoft Exchange Team Blog.

Upon checking the Intra-Org connector status on cloud we noticed that it was showing as disabled.

This confirmed why the free-busy was failing and can be fixed by executing the below command on cloud:

Get-IntraOrganizationConnector | Set-IntraOrganizationConnector -Enabled $true

Make sure the Intra-Org connectors are enabled at the On-Prem side as well for On-Prem to cloud free-busy to work correctly.

Note: As a workaround, instead of enabling the Intra-Org connector on cloud you can update the TargetSharingEpr value on the Organization Relationship in cloud with the On-Premises Exchange servers EWS ExternalUrl endpoint.

Exchange server 2013 recovery installation failure | [ERROR] The internal transport certificate for the local server was damaged or missing in Active Directory

Just recently, one of our Exchange 2013 MBX/CAS server crashed due to a kernel issue after windows updates installation. The only option ahead was to perform a recovery mode installation of the server. As this server was also a DAG member the steps discussed in this article were followed.

The recovery installation started failing at the Mailbox role stage with the below error:

[ERROR] The internal transport certificate for the local server was damaged or missing in Active Directory. The problem has been fixed. However, if you have existing Edge Subscriptions, you must subscribe all Edge Transport servers again by using the New-EdgeSubscription cmdlet in the Shell.

Our Exchange environment had two Exchange 2013 Edge Transport servers subscribed to a single AD site. As per the output received, it said the issue had been fixed and we had to re-subscribe our Edge Transport servers. However, we were not able continue with the Exchange installation.

Upon researching further on this issue online and with available logs from Event Viewer + Exchange setup logs, we understood that this error occur because the Exchange recovery procedure tries to re-encrypt the EdgeSync credentials used for Edge Synchronization process and since the self-signed certificate on this new Exchange Server 2013 is different from the self-signed certificate on the failed Exchange 2013 server encryption fails.

This issue can be fixed by clearing the old EdgeSync credential values from the Exchange 2013 server using ADSIEdit. You can do this by connecting to the Configuration Partition on your Domain Controller -> Services -> Microsoft Exchange -> Your Organization Name -> Administrative Groups -> Exchange Administrative Group (FYDIBOHF23SPDLT) -> Servers -> Your Hub Transport Server (ie, MBX/CAS server in this case) -> Right click and select “Properties” -> Edit the attribue “msExchEdgeSyncCredential” and clear the EdgeSync credential values. Save the changes.

Now re-run the recovery installation procedure and it will get completed successfully.

Reference article can be found here.

Restore deleted public folders | Exchange Server 2013

An admin accidentally deleted couple of public folders recently from the Exchange Admin Center. Now we had to restore those public folders back. The first option most of us would try is to restore the public folder from Outlook.

Launch Outlook, select the Folders view first. Right click the root folder that hosted the deleted public folder and click on Recover Deleted Items. You will notice the deleted Public Folder here, now choose Restore Selected Items and click OK.

It might take some time depending on the size of the data and number of public folders for the folders to get restored.

However, in our case the restore through outlook was not successful as it used to timeout in between. Due to this, the next approach was to restore from the Exchange Management Shell.

First, execute the below command to export all public folder information. This might take some time depending on the size of the public folders.

Get-PublicFolder –Identity “\NON_IPM_SUBTREE” –Recurse | FL >C:\PF_Export.txt

The “\NON_IPM_SUBTREE” is actually the system folder root. These are system folders that are not accessible through clients like Outlook and OWA.

Now, open the exported file and search for the deleted folder name. Find the property Identity and copy the value as shown below

Launch the Exchange Management Shell and execute the below command to restore the deleted folder and its sub folders along with the public folder permissions:

Set-PublicFolder –Identity “\NON_IPM_SUBTREE\DUMPSTER_ROOT\<GUID>\FolderName” –Path “\” –Verbose

The above command restores the public folder to the root public folder hierarchy. You can also restore to the correct parent folder if you know the path.

In case you have multiple Active Directory domains, make sure that the restored public folder AD objects are moved to the correct domain where these existed previously. There are chances these AD objects stay in the root domain after the restore.

You can use this method of restore if the folders were deleted within the deleted item retention period. For cases where the folders were deleted beyond the retention period, you will have to restore the appropriate database full backup to a recovery database.

To find out more about restoring from a recovery database backup please refer here.

Fix mailbox showing up in both Exchange Online and on-premises | Exchange Hybrid

Recently, I came across an issue where a user complained that he is not receiving emails from internal applications. Upon checking the mailbox status I noticed that the user had a mailbox hosted on our Exchange on-premises server and also on Exchange online. The on-prem mailbox only had around 100 MB, while the cloud mailbox had around 5GB data.

When the mailbox creation dates were compared, the online mailbox was created first and the on-prem mailbox got created later. In this situation when an office 365 user sends email to user it will be delivered to the cloud mailbox and when an on-prem user send email to will be delivered to the on-prem mailbox. Not sure how this condition happened, but couple of reasons are discussed here.

In this post I will be discussing the steps to recover from this scenario without making any changes to the cloud mailbox as the primary mailbox of my user is hosted in Office 365. If you want to try the other way around ie, recovering by removing the cloud mailbox and not touching the on-prem check this article instead.

1) Run the powershell command to save all mailbox information of both on-prem and cloud mailbox to a file. Make sure the data on the on-prem mailbox is exported to a PST file prior to following the below steps.

Get-Mailbox “mailbox identity” | fl > mailbox.txt

2) On the Exchange 2013 ECP, disable the user mailbox by clicking on the ellipsis (…) -> Disable.

Alternatively, you can run the below powershell cmdlet as well to disable the mailbox

Disable-Mailbox “mailbox identity”

Note : Do not delete the mailbox, only disable/disconnect. You will get an error while disabling the mailbox, if litigation hold is enabled. You can remove litigation hold by running the below command:

Set-Mailbox -Identity “user identity” -LitigationHoldEnabled:$false -DomainController DCName

3) Create a remote mailbox for the user on on-premises by running the command:

Enable-RemoteMailbox “user identity” -RemoteRoutingAddress “user@company.mail.onmicrosoft.com”

Add any additional SMTP addresses to the remote mailbox object from ECP if required. If you are using any custom attributes for AD Sync, update the same as well.

4) Identify the Exchange Online GUID of the cloud mailbox by running the below command in Office 365 Exchange Online shell

Get-Mailbox “mailbox identity” | fl *Exchangeguid*

5) Stamp the Exchange Online GUID on the remote mailbox in on-premises. This is not mandatory but will be helpful during any future mailbox offboarding.

Set-RemoteMailbox “user identity” -ExchangeGuid “Exchange Online guid”

You can see in the above screenshot that using Get-Mailbox we can verify the current Exchange Guid value. In this case its blank.

6) Now either force a directory sync or wait for the delta sync to complete. Restore the on-prem mailbox data to cloud if required.

Renewing Exchange 2013 Delegation Federation certificate

The Microsoft Exchange 2013 Delegation Federation certificate is a self-signed certificate created by the Hybrid Configuration Wizard while setting up an Exchange Hybrid between your on-premise Exchange environment and Exchange Online. When HCW is run the first time, a federation trust is created with the Azure AD Authentication System (previously Microsoft Federation Gateway) which actually acts as trust broker between the Exchange 2013 on-prem environment and Office 365. A self-signed certificate by the name “Exchange Delegation Federation” with a validity of 5 years gets created on the on-premise Exchange Server.

Below is a sample federation certificate that shows up using the Get-ExchangeCertificate cmdlet:

The Get-FederationTrust command will provide more information :

The OrgPrivCertificate parameter above provides the thumbprint of the current federation certificate while the OrgPrevCertificate will show the previous certificate thumbprint. In our case its blank as we have only one federation certificate.

Note: As per resources, with the latest version of HCW, federation trust is not enabled by default. This is enabled only if the on-prem environment has Exchange 2010 servers.

We will be discussing the renewal scenario where the federation certificate is still within the validity period and has not expired yet. If your certificate has already expired there are some additional steps and hence refer this article instead.

1. Run the below command to create a new Federation certificate

$SKI = [System.Guid]::NewGuid().ToString(“N”); New-ExchangeCertificate -DomainName ‘Federation’ -FriendlyName “Exchange Delegation Federation” -Services Federation -SubjectKeyIdentifier $SKI -PrivateKeyExportable $true

Copy the new certificate thumbprint value that you have received as the output to a notepad to use in the coming steps.

2. Setup the new certificate as the Federation certificate using the command

Set-FederationTrust -Identity “Microsoft Federation Gateway” -Thumbprint <Thumbprint> -RefreshMetaData

Replace the <Thumbprint> with the new certificate thumbprint copied from the previous step. When you run this command, the certificate is published to all Exchange servers in the environment.

The output of the command will show a notification to update the domain ownership TXT records. We will be performing this shortly.

Meanwhile check and confirm that the new Federation certificate is published to all Exchange servers. It might take some time for the certificate and its services to show up on all the Exchange servers. You can also verify by running the command :

$Servers = Get-ExchangeServer; $Servers | foreach {Get-ExchangeCertificate -Server $_ | Where {$_.Services -match ‘Federation’}} | Format-List Identity,Thumbprint,Services,Subject

Once confirmed that certificate is published, run the Get-FederationTrust | fl org*,cert* cmdlet to check if the new certificate thumbprint is showing up under OrgNextCertificate as well.

3. Obtain the new domain proof of ownership TXT records and update the external DNS.

Run the below command to generate the new TXT records for your federated domains

Get-FederatedDomainProof -DomainName <Domain> | Format-List Thumbprint,Proof

In the above screenshot, the Thumbprint and TXT Proof mentioned on top is the new one. Share the new Proof TXT record to your DNS team to get the existing TXT record in the bottom updated in external DNS.

(Please note that you will have to run this for all your federated domains. You can check your federated domains by running the cmdlet Get-FederatedOrganizationIdentifier)

4. Once the new TXT record values are updated in external DNS, publish the new federation certificate.

Set-FederationTrust -Identity “Microsoft Federation Gateway” -PublishFederationCertificate

All the steps are now complete. To verify that the federation certificate is renewed correctly, do the following :

a. Run the command Get-FederationTrust | fl *priv* and make sure the parameter OrgPrivCertificate holds the new certificate thumbprint

b. Test federation for a user using the command and confirm that all the tests are successful

Test-FederationTrust -Useridentity <emailaddress>

c. Perform free/busy tests between an on-premise and cloud user and vice versa.

Exchange Server 2016 installation error “A Setup failure previously occured while installing the PreFileCopy role”

I was installing Exchange 2016 CU11 on my lab recently and during initial stages of the installation i.e during the prerequisite analysis phase noticed the below error :

A Setup failure previously occured while installing the PreFileCopy role. Either run setup again for just this role, or remove the role using Control Panel.

The error also had a technet link mentioned here that talks about a WaterMark error and the doc explains little bit about failed Exchange server installations. But it was not that helpful in my case as I had not installed any role yet. Same error was also recorded on the Exchange setup logs and event viewer of the server.

Upon further research I found this article, which talks about almost a similar situation. As it discussed on the WaterMarks registry key and my error already had a technet link on WaterMarks, I decided to give it a try. The registry keys I located on the server was the below:

HKEY_LOCAL_MACHINE\SOFTWARE\Microsoft\ExchangeServer\v15\PreFileCopy

As you can see above, since we are in the initial stages of installation, we do not have any other folders for roles or Exchange components. So now we are supposed to delete both the highlighted registry keys Action and Watermark. These keys actually hold the Exchange server installation information.

After deleting the keys, I restarted my server and initiated the Exchange installation again. Sadly, the same error repeated again. I then went ahead and deleted the entire PreFileCopy folder from registry and rebooted the machine. Tried my luck again, and the installation completed successfully.