Microsoft Azure lets you create both Point-to Site and Site-to-Site VPN connections between your on premise network and Azure network. In this post, I will be demonstrating the steps to create a Point-to-Site VPN connection ie you can connect to Virtual Networks in Azure from your workstations. Point-to-Site VPN which we discuss here makes use of SSTP [Secure Socket Tunneling Protocol, which makes use of certificates] protocol.
- First log in to your Azure account. In my environment, I have already created a DNS Server in Azure as shown below:
The steps for creating a Virtual Network is shown below:
- Configure a new Virtual Network for this purpose by navigating to NEW -> Network Services -> Virtual Network -> Custom Create.
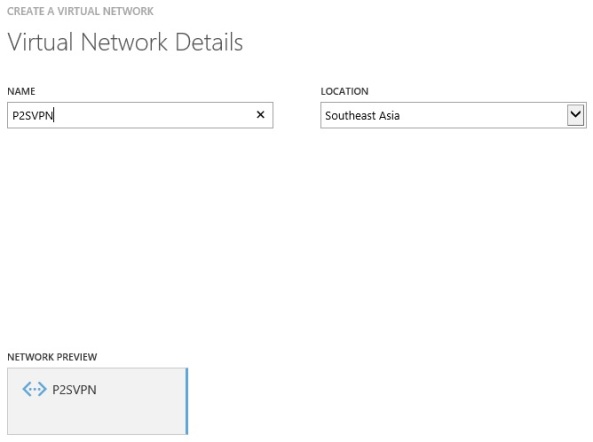
- Specify a Name for the connection and the Datacenter Location and click Next.
- You can either specify the DNS server you have configured or leave this section blank for Azure default name resolution service. Then select the checkbox for Point-to-Site connectivity.
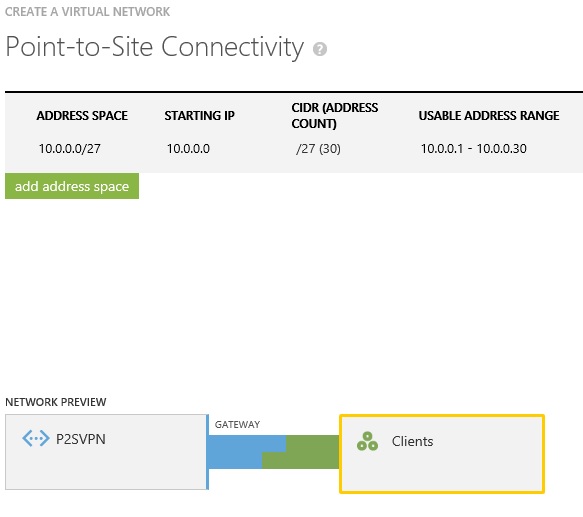
- On the next page, specify the Address Space and Usable IP Address Range. This IP address will be assigned to VPN clients, while connecting to the Virtual Network.
- On the next page, specify the Address Space and Usable Address Range to be used by the VMs. Make sure this IP range does not overlap with the on premise network. Select the option ‘Add gateway subnet‘ to specify a gateway for the Point-to-Site connection as well.
- Complete the Virtual Network configuration. You will see the status of the Virtual Network as Created.
Next step is to create a Dynamic Routing Gateway.
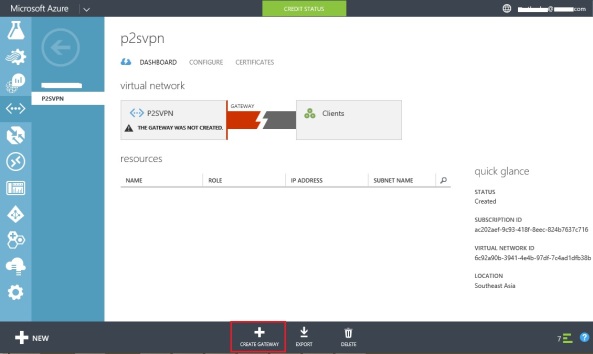
- Select Networks -> Your Virtual Network -> Select Dashboard -> Select Create Gateway.
- Click on Yes when it asks if gateway needs to be created or not. Once the gateway is created, this is how the screen will look like:
Now create a Root Certificate and upload it to Azure Virtual Network.
- Install Microsoft Visual Studio Express 2013 for Windows Desktop which is a free version. Navigate to the Visual Studio Tools folder and launch the command prompt for VS2013.
- Use the below command to install a root certificate in the personal certificate store of the machine:
makecert -sky exchange -r -n “CN=RootCertificateName” -pe -a sha1 -len 2048 -ss My “RootCertificateName.cer”
RootCertificateName :- Name of the Certificate
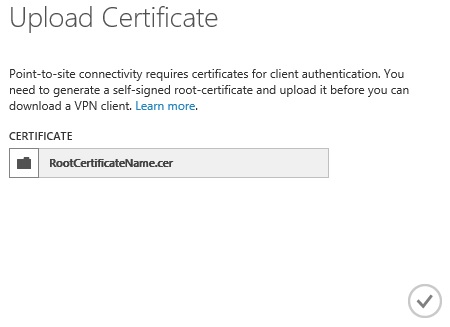
- Upload the root certificate file to the management portal under the certificate section in Virtual Network. Once uploaded it will show the status as Created under the Certificates tab.
Next step is to create a Client Certificate.
- Use the below command to create a Client Certificate. Once the command is executed, it will be installed in the Personal certification store of the computer.
makecert.exe -n “CN=ClientCertificateName” -pe -sky exchange -m 96 -ss My -in “RootCertificateName” -is my -a sha1
In order to connect to the Virtual Network from multiple computers, export the client certificate and install it in the machines.
Download and Install the VPN client:
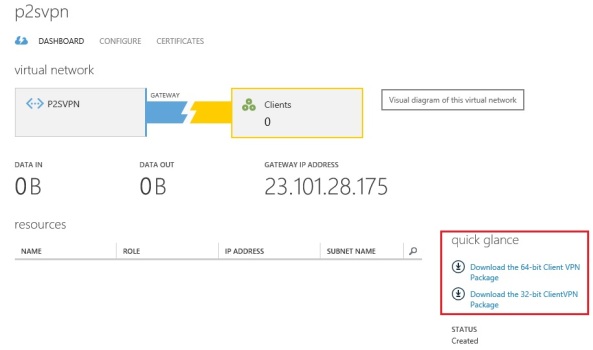
- Based on the workstation architecture, download the suitable VPN client package and install on your machine from this section:
- When installed, you will see the VPN icon created in the Network Settings. You can click on Connect button to initiate the VPN connection to Azure Virtual Network. Click on Connect again.
- You will have to specify the Client certificate when asked for.
- To check the working of VPN connectivity execute the command ipconfig /all to find out the IP address details.


