Exchange Server 2016 installation error “A Setup failure previously occured while installing the PreFileCopy role”

I was installing Exchange 2016 CU11 on my lab recently and during initial stages of the installation i.e during the prerequisite analysis phase noticed the below error :

A Setup failure previously occured while installing the PreFileCopy role. Either run setup again for just this role, or remove the role using Control Panel.

The error also had a technet link mentioned here that talks about a WaterMark error and the doc explains little bit about failed Exchange server installations. But it was not that helpful in my case as I had not installed any role yet. Same error was also recorded on the Exchange setup logs and event viewer of the server.

Upon further research I found this article, which talks about almost a similar situation. As it discussed on the WaterMarks registry key and my error already had a technet link on WaterMarks, I decided to give it a try. The registry keys I located on the server was the below:

HKEY_LOCAL_MACHINE\SOFTWARE\Microsoft\ExchangeServer\v15\PreFileCopy

As you can see above, since we are in the initial stages of installation, we do not have any other folders for roles or Exchange components. So now we are supposed to delete both the highlighted registry keys Action and Watermark. These keys actually hold the Exchange server installation information.

After deleting the keys, I restarted my server and initiated the Exchange installation again. Sadly, the same error repeated again. I then went ahead and deleted the entire PreFileCopy folder from registry and rebooted the machine. Tried my luck again, and the installation completed successfully.

Downgrade Forest and Domain Functional level on Windows Server 2016

My lab has a Windows Server 2016 Active Directory domain. For some reason, I wanted to downgrade the forest and domain functional level. When researching on this topic I came to know that starting from Windows Server 2008 R2, you have the option to downgrade the forest/domain functional level to a minimum of Windows Server 2008.

Here we are discussing the powershell commands that can be used for the same.

Launch PowerShell as Administrator and execute the cmdlet

Import-Module -Name ActiveDirectory

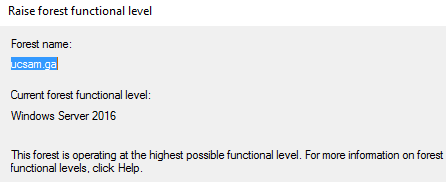
To check the current forest functional level using GUI, navigate to Administrative Tools -> Active Directory Domains and Trusts. Right click Active Directory Domains and Trusts and select Raise Forest Functional Level.

To check the status on powershell use the cmdlet:

Get-ADForest | fl name,forestmode

Similarly, to check the Domain functional level just right click the domain name under Active Directory Domains and Trusts and select Raise Domain Function Level.

To check the status on powershell, use the cmdlet:

Get-ADDomain | fl name,domainmode

Once we have confirmed the current state, run the below commands to downgrade the forest and domain functional levels from Windows Server 2016 to Windows Server 2012:

Set-ADForestMode -Identity <Domainname> -ForestMode Windows2012Forest

Set-ADDomainMode -Identity <Domainname> -DomainMode Windows2012Domain


Finally, to confirm that the downgrade was successful, you can use the GET commands as shown below:

Changing SID of a cloned machine using sysprep tool

I created some VMs in my lab recently and one of the VMs were cloned. When I tried to add this particular Windows Server 2012 R2 VM to domain it showed the following error

SID

I used the sysinternals tool PsGetsid to confirm that the SID on both the base VM and the clone were the same.

So, the next thing to do is change the SID of the server which I am trying to add to domain. By default, Sysprep is available in Windows with which you can perform this operation.

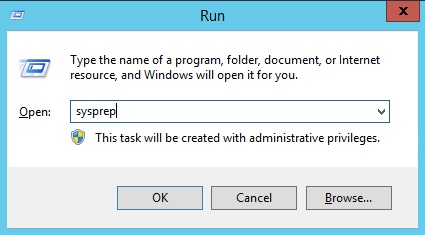
Go to Run and type Sysprep  and click Enter.

sid1

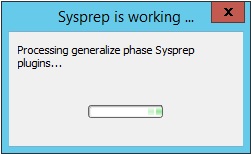
In the Sysprep folder, launch the sysprep application.

sid2sid3

Select the Generalize check box and click OK.

sid4

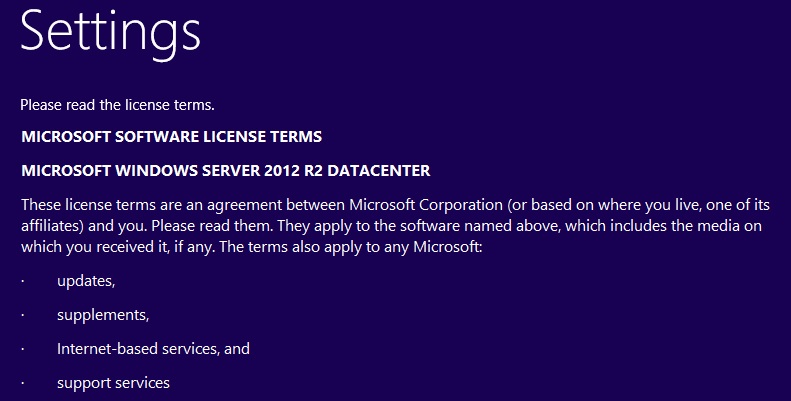
Sysprep will start and once done your machine will restart to the below screen

sid5.jpg

sid6

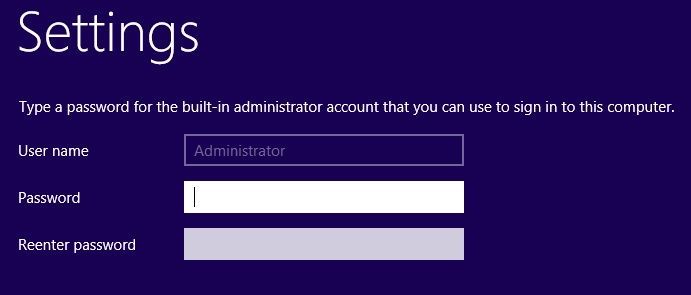
sid8

Input the values and you will login to the machine. You may have to change the hostnames etc. again.

Disable Clutter folder in Office 365

Office 365 has added a new feature called Clutter starting from June 2015. A new folder called Clutter will be available, if you have an Exchange Online mailbox. It performs intelligent email filtering and based on the behavior of an individual, moves low priority mails to this folder.

You can see it as a great feature, at the same time some people feel it is unnecessary. This blog post hence will describe how to disable the clutter folder or de-clutter your inbox.. 🙂

For an individual, this can be achieved through your OWA settings. Once logged into OWA, select Options -> Mail -> Clutter.

If clutter is enabled, you will see the below screen

image001.jpg

You can just un-check the above boxes and save the settings to disable this feature.

A point to be noted, even-though you disable the feature, the clutter folder still remains in your mailbox and all the mails which were previously in this folder will remain there itself. Since you disabled the feature, new mails wont be moved to this folder. 

An administrator can disable a user’s clutter folder through PowerShell as follows:

Set-Clutter -Identity user@domain.com -Enable $false

In order to globally disable the clutter feature, use the below cmdlet [this may consume some time]:

Get-Mailbox | Set-Clutter -Enable $false

Administrators at some point may have to disable this feature for a certain set of people in your organization, based on some parameters or attributes. For example, the Company attribute. In that case you can use the below cmdlets

For simplicity, we can assign all the user mailboxes in Contoso company to a variable and then call the variable and disable clutter.

$contosousers=Get-Recipient -filter {company -eq “Contoso”} | where {$_.recipienttype -eq “usermailbox”}

In the next step, execute

$contosousers | Set-Clutter -Enable $false

This may also take some time depending on the number of mailboxes.

PowerShell commands to connect to Exchange Online

As more and more businesses are moving to Office 365 for email, IM etc managing their respective service lines is a day to day task for an IT Engineer. Similar to managing your environment through the Office 365 portal, admins also use PowerShell for more flexibility every now and then. In order to perform any complex admin tasks on Exchange Online, admins need to connect to their O365 tenant. The below commands can help you achieve the same :

$UserCredential = Get-Credential

Click Enter Key after the above command. You will be asked to supply your O365 tenant credentials.

1

$Session = New-PSSession -ConfigurationName Microsoft.Exchange -ConnectionUri https://outlook.office365.com/powershell-liveid/ -Credential $UserCredential -Authentication Basic -AllowRedirection

Import-PSSession $Session

The modules will be loaded and you will be connected to Exchange Online.

2

EMC Crash with exception “FX:{A5406CA3-6393-48a0-8827-CF06F0C94C55}”

There has been many instances where the Exchange Management console crashes when I used to work on Exchange Servers, particularly on Exchange Server 2010. Most of the time the issue gets resolved when you end the task from Task Manager and launch a new session.

However, in this particular Exchange Server I was working with, the MMC kept on crashing throwing exceptions. This post provides the steps to resolve a similar issue.

The Exception I kept on getting is shown below :

FX:{A5406CA3-6393-48a0-8827-CF06F0C94C55}

mmc crash

This issue can be resolved with the help of a small .bat script..

All you have to do is in a notepad copy the below script and save it in .bat format.

set __COMPAT_LAYER=RUNASINVOKER
set COMPLUS_Version=v2.0.50727
“C:\Program Files\Microsoft\Exchange Server\V14\Bin\Exchange Management Console.msc”

Execute the script and confirm the working of EMC.


Reference :- https://social.technet.microsoft.com/Forums/exchange/en-US/02881780-9982-4a5a-a7fd-1cf609913779/exchange-2010-installing-emc-sp2-on-windows-8?forum=exchangesvrdeploylegacy

Error “Outlook Web App didn’t initialize. If the problem continues, please contact your helpdesk.”

Recently, I faced an issue logging in to OWA on our client’s Exchange 2010 server. The error reported was as follows :

Outlook Web App didn’t initialize. If the problem continues, please contact your helpdesk.
Couldn’t find a base theme (folder name=base)

owa1

Initial troubleshooting steps were taken, like restarting the Microsoft Exchange Form Based Authentication service, re-creating OWA virtual directories etc..

Upon further researching on the issue, I found a similar post online where the OWA crashed after installing the Exchange updates..

So, in order to resolve the issue all you need to do is launch Exchange Management Shell, navigate to the location C:\Program Files\Microsoft\Exchange Server\V14\Bin and then execute the power shell script UpdateCas.ps1.

owa2

This script will find your OWA/ECP virtual directories, update them and make some modifications to metabase etc.. Once completed, you will be able to access your OWA/ECP like before.. 🙂


Reference :- https://social.technet.microsoft.com/Forums/exchange/en-US/dd91598d-3af9-4a98-8493-34726c763c62/owa-failed-to-initialize-after-install-of-rollup-1-for-exchage-sp1?forum=exchange2010

Error: The specified domain either does not exist or could not be contacted

I received an error trying to launch the Active Directory Users and Computers console on a Windows Small Business Server 2011.

I tried executing the command ‘netdom query fsmo‘ to identify whether the DC I logged in holds all the roles or not. I received the same error here as well, as shown below:

Error

Upon checking the services, it was found that the Windows Time service was not started. However, attempting to start the service resulted in the below pop-up

err1

As indicated in the notification, the Netlogon service was found to be Paused.

err2

The issue was resolved after starting the Netlogon and Windows Time services in the Server .


NIC teaming on Windows Server 2012

Teaming NIC’s has been in the industry for quite some time now. Until now, NIC teaming was done using drivers or software obtained from the NIC vendors itself. With the release of Windows Server 2012, Microsoft has included Operating System level teaming support. It even lets you team NIC’s of different vendors.

A scenario is discussed in this post which was recently performed on a Dell PowerEdge R720 that has a quad port NIC. The OS installed in the host was Windows Server 2012 R2 Datacenter Edition. The host was a member of an Active Directory domain and had couple of VMs installed. My job was to team the 2 NICs and assign it for the VMs.

Log in to the Windows Server. As shown below I had 4 NIC’s, 2 of them enabled and 2 disabled.

Team1

Here, NIC 1 was already assigned with an IP.

Launch Server Manager -> Local Server. From Properties, click on the Disabled option adjacent to NIC Teaming.

Team2

Now you will get a console similar to the one shown below:

Team

The available NICs are displayed on right hand side and the Team section on the left hand side. Select the Tasks drop down menu and click on New Team.

team1

Select the NICs that needs to be teamed. Here, we will team NIC1 and NIC2 as planned before.


cap2


As you can see there are different Teaming and Load Balancing modes available, which will be discussed later in this post.

Once teaming is done, you can see the NIC’s arranged under the Team as shown below:

3-1


Also, if you view the Network Connections wizard you will notice a new adapter along with the NIC’s. This can be seen below:

7

The IP address for this network will have to be specified in this adapter next. If you check the properties of NIC1 and NIC2, you will notice that IPV4 settings will be disabled. Now, when you create a Hyper-V switch, you will find another adapter known as the Hyper-V virtual network adapter as well. The IP address settings will then be moved to this new adapter.

Note:

If you select the teaming mode as LACP, which is a switch dependent type and in case the configurations are not performed at the network switch end, you may receive errors. One such example is shown below:

6


 Teaming Mode:

The teaming mode can be Switch Dependent or Switch Independent. As the name says, Switch Independent means teaming is not required on the network switches, Switch Dependent requires teaming to be configured on the network switches.

  • Switch Independent mode works better with a Failover scenario [where you have both Active and Standby adapters] rather than Load Balancing. However, if you are planning to use Switch Independent mode for Load Balancing, you will have three Load Balancing modes:
    • Address Hash
    • Hyper-V Port
    • Dynamic

switch


  • If you are using Switch Dependent mode, you will have to configure the network switches as well. The available teaming mode types are
    • LACP
    • Static

1


The load balancing mode types will be the same as mentioned before. Depending on the Teaming mode selected, you will have option to assign a NIC as a Standby Adapter.


To get a better picture of this topic check out the link : 

http://blogs.technet.com/b/keithmayer/archive/2012/10/16/nic-teaming-in-windows-server-2012-do-i-need-to-configure-my-switch.aspx


Login Error RAC0218: The maximum number of user sessions is reached

Recently, a Hyper-V server at a client site was shutdown due to some errors. As it was after office hours, the only way to bring the server back up was using DRAC. DRAC Enterprise was installed in the server already. However, for my bad luck, when logging in to DRAC I received an error as shown below:

Capture

In order to resolve this issue, all you have to do is to SSH in to the DRAC, preferably using Putty tool. Launch Putty and enter the DRAC IP of the Server.

putty

Once connected, enter the DRAC credentials. Next, execute the command racadm racreset in the console as shown below:

rac

Check and confirm that you are able to login through the DRAC web console now.