Step by Step : Migrate to Office 365

As we all know Office 365 is Microsoft’s cloud hosting platform which is much popular now. Most of the small business organizations are planning to or have already migrated to Office 365.

The popularity of Office 365 in the small business sector is mainly because its hosted in Microsoft Datacenter in cloud and that your company does not have to spend money on IT and IT support. You can leverage Office 365 to use Exchange Online, Sharepoint Online, Lync online, Office web apps etc..

If you currently have an on-premise Exchange Server, or if you are setting up your infra for the first time the following steps will help you for the same:

  • First purchase the Office 365 subscription of your choice.

You can either use the default domain which Microsoft provides ie, @companyname.onmicrosoft.com or the domain which you have already purchased from any of the registrar’s. Here, I assume you have your own domain in hand.

  • Log in to your Office 365 account with the credentials provided from Microsoft
  • Select Manage Domains from the Admin console

Office 365

  • In Manage Domains section, at first you will see the default domain provided by Microsoft ‘@companyname.onmicrosoft.com
  • As we will be adding a new domain to Office 365, select Add Domain tab in the console

office 4

  • There will be a list of steps which needs to be performed for adding the domain as shown below-

office 3

  • You will have to specify the domain name first and then click on Next

office6

  • Next part is the domain verification process. office 365 will confirm whether you are the owner of the domain or not. For this you will have to create either a TXT record or an MX record on your domain’s DNS. Usually Office 365 will ask to create any of the below records :

office5

Once you have created either of the records in your domains DNS console, your domain will be verified.

  • Next, you will have to create users for the domain and assign licenses

office7

  • The next step is to create the DNS records provided by Office 365 in your domain’s DNS. If you are planning to use all the Office 365 services, you will have to create the below records :


12

Note: It’s always better to keep your old MX records as a backup with low priority and the Exchange Online MX record with higher priority. Make sure you proceed with the domain set up only after creating the relevant records. Office 365 will not proceed if any records are missing.

Once all records are created, click Finish and your domain will be now added to Office 365.

  • Select the new domain under Manage Domains, and select Set as default, to make it the default domain
  • If you have only one license, assign the license to the new user account

license

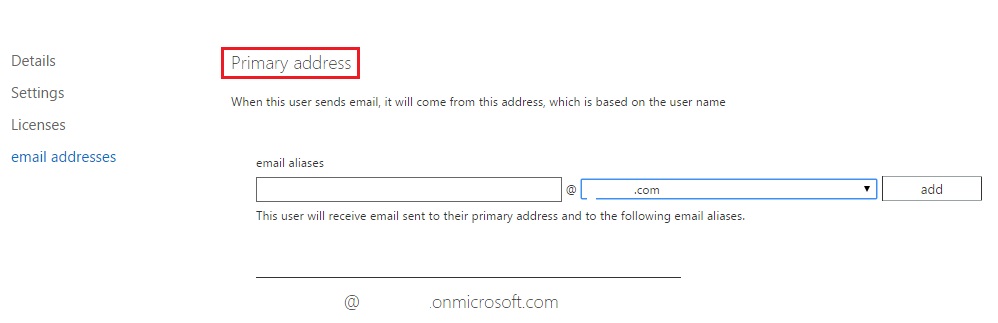
  • Next step is to change the primary email address to the new domain. For this edit the user account and select Primary Email Address.

primary

  • Assign the new user Administrator privileges so that the new user will also have access to the Admin console. This can be done from the settings of the user account.

permissions

  • Check and confirm that the mail flow

Office 365 also lets you access office apps like MS Word, MS PowerPoint etc as well as OneDrive. You will have to download the app for the same from office 365 console to be installed on your PC.


Error accessing OWA “Microsoft.Exchange.Data.Storage.AccessDeniedException”

A client having Exchange 2013 recently faced a strange issue while logging in to OWA. The error is shown below :

owa

Upon further analyzing the error, it was found that this error can occur due to two reasons:

  • If the attribute msExchVersion value is different for a user
  • Due to insufficient permissions

First, we can check the Exchange version for a particular user who has the issue. For this, execute the below command in EMS:

Get-Mailbox <User_Name>| format-list ExchangeVersion

If the value that returns is less than 0.1, then the Exchange Server will consider this user object only as Read-only. This issue can be resolved by executing the command :

Set-Mailbox <User_Name> -ApplyMandatoryProperties

If you again check the Exchange version it will show a value like eg: 88218628259840 [ for Exchange Server 2013]

You can also check the value of the attribute msExchVersion from attribute editor in ADSIEdit.

owa2


If you still face issues when accessing owa or ecp, perform the second step.

  1. Navigate to Active Directory Users and Computers
  2. Find the user and select Properties -> Security -> Advanced
  3. Select Enable inheritance
  4. Add a Principal value like Domain Admins and required access type
  5. Click OK
  6. Check and confirm that OWA or ECP is accessible without any issues

Inherit


Reference: http://support2.microsoft.com/kb/941146


Generate Remote Activation Password for Blackberry user !!

With the help of Remote Activation, a user can activate his/her RIM Blackberry which is on a Blackberry Enterprise Server. For this the blackberry user will have to request a Remote Activation Password from the Blackberry administrator.

Following are the steps that needs to be performed on the BES:

  • Launch Blackberry Administration Service. Log in using your credentials.

1

  • Select Manage Users from Users section.

new

  • Select the user, right click and select Properties. Navigate to Device Activation -> Specify an Activation Password

new2

  • Set the Activation Password as per your wish. Provide this to the user to perform a Wireless Enterprise Activation.

Extending capacity of a virtual disk on MD3200i !!

We have a client who has got several ESXi servers. Recently, a local drive on one of the virtual servers reported low disk space. I need to extend the space of this drive at any cost.

This local drive is actually allocated from a virtual disk on the SAN device they have, which is Dell MD3200i. This particular virtual disk resides on a Disk Group created from a RAID 6 volume as well. The LUN or virtual disk we are talking about is mapped to the VMware host which in turn is mounted as a hard disk on the virtual machine.

So, in order to extend the drive capacity the procedure will be as follows :

  • Increase the capacity of the virtual disk on MD3200i:  Steps are shown below:-

Connect to the Dell MD3200i console.

Dell1

Select the tab Storage & Copy Services. Right click the virtual disk under the respective Disk Group, and select Increase Capacity.

Dell2


Click on OK, when the below window appears:

VD0

Now, you will have to input the amount of space you need to extend and click OK.

VD01

The process will begin and you will find a status bar as shown below:

VD1

Even though we are increasing the capacity of a single LUN in a disk group, all other LUNs will be prepared and defragmented which will further increase the time for the entire process.

VD3

The above image shows the status of the task. Wait till the capacity of the lun is increased.

  • Extend the datastore capacity in ESXi host:

You have increased the capacity of the lun at this point. As informed earlier, the lun is mapped on the host server. The datastore size should change in the ESXi server as well.. right ??? Even-though you refresh your storage, the capacity of the datastore in the ESXi host may not change. At that time you have to manually extend the datastore capacity.

First, log in to the ESXi host server. Navigate to Configuration -> Storage, and select your datastore [as well as virtual disk]. Select the datastore and click on Properties.

VM1

Click on the Increase button as shown below:

VM2

Next, it will show you the current LUN space and the free space available [free space obtained from increasing lun capacity]. Click Next.

VM3

In the next step, it will combine both the free space to the lun. Click Next and then Finish.

VM4

Now you have completed the steps for extending the datastore.

  • Extend the hard disk from the virtual machine Edit Settings:

On the ESXi host, select the virtual machine and click on Edit Settings. In order to extend the capacity of the hard disk the virtual machine should be in shutdown state as we know. Select the hard disk and increase the capacity as required. Once done click on OK.

VM3


Turn on the virtual machine and log in to the server.

  • Extend the capacity of the drive from Disk Management

This is the final step in the task. Once logged in to the server, launch Disk Management. Select the disk. You will notice unallocated space on the right hand side of the disk. Right click the partition and select Extend Volume.

Moving OAB Generation Server in Microsoft Exchange Server 2013 !!

With Exchange Server 2013 in order to manage your Exchange environment, you will have to make use of Exchange Admin Center. As of now with EAC you will not be able to manage all Exchange features, due to which Exchange Management Shell has the same importance as EAC.

Managing OAB likewise will require the use of Exchange Management Shell or cmdlets. You can use the below cmdlets for the same:

  • Creating a new OAB

New-OfflineAddressBook -Name OAB -AddressLists “Global Address List”

  • Identifying the OAB generation server

In Exchange 2013, it is the duty of the arbitration mailbox “Organization mailbox” to generate the OAB’s required for the Exchange environmnet. This mailbox is hosted in the Exchange Server 2013 mailbox server.

Get-Mailbox -Arbitration | where {$_.PersistedCapabilities -like “*oab*”} | ft name,servername

oab 1

  •  Move the OAB generation server

As we now know that the ‘Organization Mailbox‘ is the one that generates the OAB, we have to first make sure that the Organization mailbox resides in the mailbox database of the Exchange server which we are planning to assign the role of OAB generation server.

For this purpose, we will have to move the Organization mailbox to the new server’s mailbox database. This can be achieved using the shell command :

Get-Mailbox -Arbitration -database MDB01| where {$_.PersistedCapabilities –like “*oab*”} | New-MoveRequest -TargetDatabase MDB02

where, MDB01 is the name of the mailbox database that holds the Organization mailbox initially, and MDB02 the mailbox database to which the Organization mailbox is moved.

oab 12

Now, if you execute the command to identify the OAB Generation server, it will indicate the new Exchange Server only.


Reference :
http://blogs.technet.com/b/exchange/archive/2013/01/14/managing-oab-in-exchange-server-2013.aspx

Error “The remote session was disconnected because there are no Remote Desktop License Servers available to provide a license” !!

One of our clients had recently configured Remote Desktop Services on a Windows Server 2012 R2 OS. Since it was a small infrastructure, all the remote desktop roles were installed on the single server. The RDP CALs were installed on the Remote Desktop Licensing Manager console as well.

However, every time the client tries to RDP to the RDP server, it shows the below error :

RDP1


Other than this, in the RD Licensing Manager, the RDS per user CAL information was not being displayed. When accessing the Remote Desktop Services Overview option from Server Manager, all it show is :

RDP2


At the same time, when trying to find the configuration details from the PowerShell by executing the command Get-RDLicenseConfiguration, you get


Upon checking the event log errors and the Remote Desktop License Diagnoser some errors were displayed. Once of the error reported as follows :

RDP4

Another error was,

RDP5

The second error was resolved by deleting the binary key L$RTMTIMEBOMB from the GracePeriod registry in the location HKEY_LOCAL_MACHINE\SYSTEM\CurrentControlSet\Control\Terminal Server\RCM\GracePeriod.

Note: In order to delete this key, you will have to take full permission of the GracePeriod registry key or you may receive an error as shown below:

RDP6

You may have to reboot your server as well. However, the issue persisted even after performing the above steps. In order to check whether the licensing server is configured you can execute the below command in PowerShell

$obj = gwmi -namespace “Root/CIMV2/TerminalServices” Win32_TerminalServiceSetting

$obj.GetSpecifiedLicenseServerList()

RDP7

As you can see, in the above image the SpecifiedLSList is shown as empty. Run the below commands to enable the per user mode and also to manually specify the LicenseServer.

  1. Open an elevated Windows PowerShell prompt
  2. Type the following command on the PS prompt and press Enter:$obj = gwmi -namespace “Root/CIMV2/TerminalServices” Win32_TerminalServiceSetting
  3. Run the following command to set the licensing mode:
    Note: Value = 2 for Per device, Value = 4 for Per User$obj.ChangeMode(value)
  4. Run the following command to replace the machine name with License Server:$obj.SetSpecifiedLicenseServerList(“servername”)
  5. Run the following command to verify the settings that are configured using above mentioned steps:$obj.GetSpecifiedLicenseServerList()

The result will be

RDP8

The RD Licensing Manager will also display the RDS per user details.

RDP

The RDP to the server worked as a charm too..


Reference : http://social.technet.microsoft.com/Forums/windowsserver/en-US/ebc032e2-ab2d-4acd-aef7-28ed548be569/how-to-set-up-remote-desktop-licensing-mode-in-windows-server-2012?forum=winserverTS